| |
Geometric models are created in a virtual 3D space that
is then projected to a 2D surface of the computer display. Using
one of the projection methods—orthographic, axonometric,
oblique, or perspective—3D co-ordinates of points in space
are converted into xy co-ordinate pairs in the 2D plane of the display.
In traditional projective geometry, projections are created by
establishing a picture plane somewhere in space and casting projection
rays from points in space toward the picture plane. In computer
graphics, projections are created by mathematics applied to xyz
co-ordinate triplets. For example, plan projection is created by
discarding the z co-ordinate.
AutoCAD does not support oblique projection. Orthographic,
axonometric, and perspective projection methods are fully supported.
The creation of a perspective projection simply involves choosing the
perspective option in one of the menus. However, if a specific
perspective is wanted, from a particular viewpoint, the set-up requires
that several parameters be provided:
- location of the viewpoint referred to variously as the eye or
camera,
- location of the target point,
- viewing angle, and
- location of the front and back clipping planes.
The view (eye) and target points define the line of sight, which,
with the viewing angle, defines the cone of vision or, as it is
often called, the viewing pyramid.
AutoCAD uses a camera metaphor in setting-up a perspective
projection. To change the viewing angle, adjust the zoom lens length.
The camera can also be twisted and panned.
Some modellers offer depth clipping to eliminate from the
scene those objects that lie in front or in back of the
viewing pyramid. This is done by specifying the distance of the front
and back clipping planes from the viewpoint..
Most modellers can simultaneously display more than one projection.
Typically, the program's window is sub-divided into four viewports, each
displaying a different projection: top, front, right, and axonometric or
perspective. In AutoCAD, the number, content, and configuration of
viewports can easily be set-up and changed. From the View menu,
choose Tiled Viewports, then Layout, to subdivide the
graphics area into several viewports, and then set-up the desired
projection in each viewport. |
|
Hidden-line Removal |
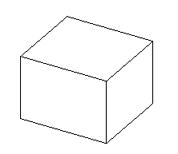
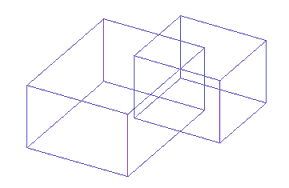
Spatial ambiguity of the wireframe display is a problem
in modelling—shapes can be unclear. To prevent such ambiguities,
some systems employ display conventions such as varied line weight, line
type, colour, etc. to indicate depth.
A far better approach is to generate a hidden-line or shaded view of
the model. The hidden-line procedure computes which edges are cut or
hidden by opaque surfaces.
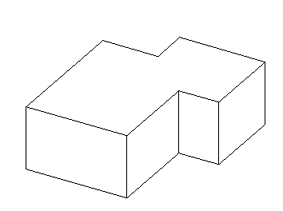
Be aware that hidden-line drawings produced by modelling programs,
however, often need to be corrected and improved to achieve acceptable
graphic quality. A common problem is that hidden-line algorithms do not
create new edges implied by the model's geometry, as in intersecting
objects. Such problems can be corrected by avoiding intersecting objects
or adding the missing lines later by editing the 2D projection drawing.
In AutoCAD, hidden-line and shaded views of the model can be created
by choosing Hide or Shade (and one of the four shading
modes) from the View menu.
|
 |
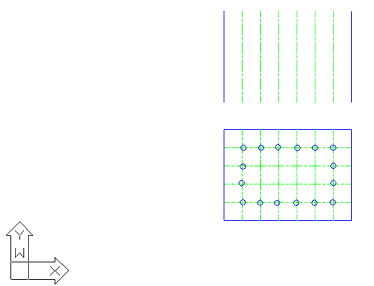
Command: copy
Hold down left mouse button. Drag window from right to left
(direction is IMPORTANT!) across the plan, crossing all vertical
lines, but no horizontal lines. The right to left selection
window, selects everything it crosses even objects not fully contained
by the window.
Base point:
Ignore location of cursor and simply click left button. Polar
coordinate method of defining displacement will be used in next
response.
Second point of displacement: @13000<90 (i.e.,
move up 13 metres)
Relocation using the AutoCAD polar coordinate method is based on
distance from an origin and angle relative to the X axis. AutoCAD's
normal mode of angle measurement is anti-clockwise. Your drawing should
resemble the figure below.
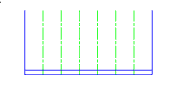
The grid lines from the Plan are longer than necessary. Autocad's
stretch command is ideal for changing the length of many things at
once.
|
| Drawing Floor |
Set drawing layer to floor (See above for
method)
To draw the bottom edge of floor:
Command: line
From point: end (or  from the Snaps toolbar)
Endp of: Pick bottom end of the left elevation grid
line drawn above.
To point: end
Endp of:
Pick bottom end of right grid line
To point: (to exit) (to exit)
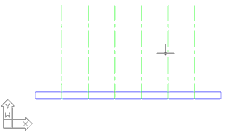
To create top edge of floor, 500mm above (use bottom edge):
Command: offset (or  ) )
Offset distance or Through: 500
Select object to offset:
Pick bottom edge of floor
Side to offset?
Pick side above
Select object to offset:
(to exit; See figure, below)
Then convert the long sides to the floor layer and trim them at floor
level:
Command: change
Select objects: end
of
Pick both vertical edges
Properties/:
p (for Properties)
Change what property ?: la (for layer)
New layer : floor
Change what property ?:
(to exit)
Now trim the excess:
Command: trim
Select cutting edge(s)
Select objects :
Pick top line of floor
<Select object to trim>:
Pick both edges extending above the floor line. See figure below.
<Select object to trim>:
(to exit)
Command: qsave (save your work frequently) |